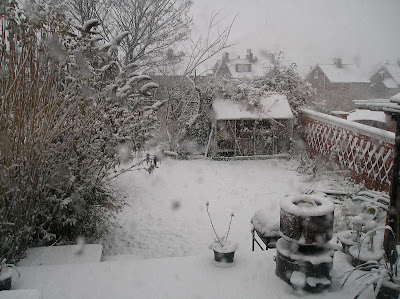
We live in Yorkshire, in the North of England and to be honest it hardly ever snows these days. We have had White Christmases in the past but probably 20+ years ago. If it does snow it is usually in February. We have been having very cold weather lately and today it is snowing heavily. To be honest we are not really set up for snow in this country - we only just made it back home after a trip to the supermarket. We do live on a hill but really my little Fiat Panda was not happy. So now I will spend the rest of the afternoon sewing, keeping warm and hoping that Jonathan is not working tonight as he left his wellies in the mud at Leeds Festival in August and the only shoes he has without holes are the Nike trainers I have bought him for Christmas which cost £70!
Anyway the main subject of this post is my new Christmas wallhanging which I made a few weeks ago from Cheryl Goss's design. She trades as Willowberry designs and this stitchery pattern was a freebie on her blog which you can find here.
It is only about 14 inches square but was very quick and enjoyable to stitch. She made hers into a bag but I decided a wallhanging was best for me.
This is a blog to record my quilting journey. Quilting is my passion. I make quilts, teach patchwork and quilting in South Yorkshire UK and am the co founder of 3 Quilt Groups in Yorkshire.
Sunday, 20 December 2009
Friday, 18 December 2009
Image Transfer
This is one of my City & Guilds pieces but I thought I would share it as I am quite pleased with it. However I have really struggled to get a good photo of it so it does look better in real life.
I printed Jonathan's photo in black and white onto some lightweight vilene. I backed this with white cotton and then stitched the coloured lines using my twin needle with red in one and orange in the other.
I then layered it with wadding and backing and quilted it with a silver metallic thread.
I printed Jonathan's photo in black and white onto some lightweight vilene. I backed this with white cotton and then stitched the coloured lines using my twin needle with red in one and orange in the other.
I then layered it with wadding and backing and quilted it with a silver metallic thread.
Saturday, 5 December 2009
Photo manipulation
This weekend I have realised that I need to get on with my homework for college next weekend. The topic for this month is image transfer and one of the first things I had to do was digital photo manipulation using computer software.
I didn't know where to start with this but luckily Hazel came to the rescue with some free internet software that you can find here.
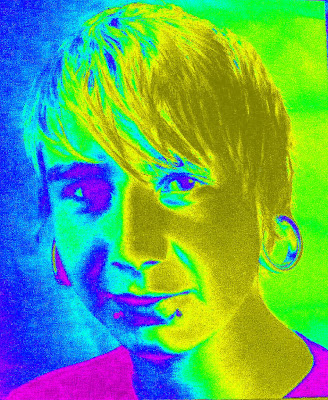
So I started with a photo of Jonathan my eldest son and tried to get some Andy Warhol effects.
This was the best one.
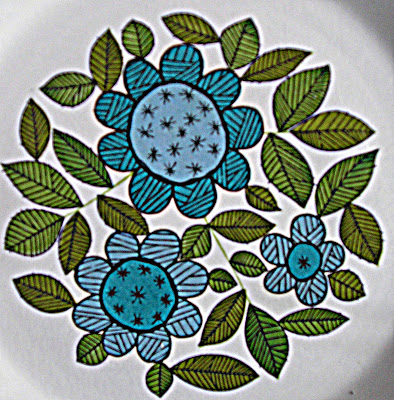
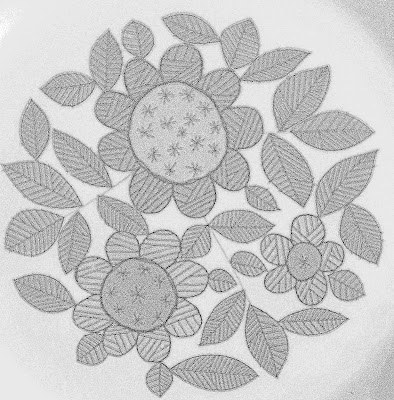
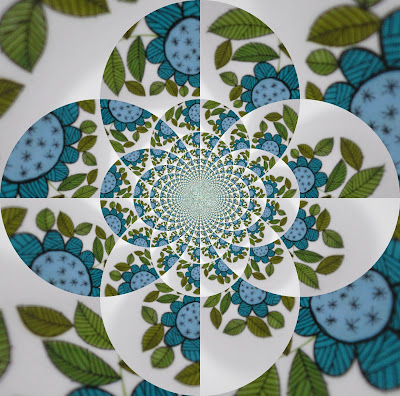
Then I used a photo of one of my 1960s plates I am using for my personal theme this year.
Tuesday, 1 December 2009
Quilting the Halloween Quilt
This last weekend I decided to try basting my Halloween quilt using Sharon Schamber's method. You can see how to do it by viewing this free video.
http://www.sharonschambernetwork.com/free_area/videos/basting/index.html
First I rolled my quilt back and quilt top onto long pieces of wood - I actually bought wood meant for pine cladding.
Here you can see the ends of the wood to give you a better idea.
http://www.sharonschambernetwork.com/free_area/videos/basting/index.html
First I rolled my quilt back and quilt top onto long pieces of wood - I actually bought wood meant for pine cladding.
Here you can see the ends of the wood to give you a better idea.
The backing is unrolled to a forearm width - elbow to hand. Lay the wadding on top - mine is the black stuff. Then unroll the quilt top, smoothing it all out.
I then basted using Sharon's herringbone stitch - this is very easy to do but I couldn't do it with a thimble so it did make my right index finger very sore!
Then you move the quilt towards you over the side of the table and unroll the next portion.
I then basted using Sharon's herringbone stitch - this is very easy to do but I couldn't do it with a thimble so it did make my right index finger very sore!
Then you move the quilt towards you over the side of the table and unroll the next portion.
I basted the whole quilt by this method which took a couple of hours. I have started quilting and am very pleased with how the layers seem to be kept together very well.
I have been thinking a lot about the actual quilting of quilts recently as it is an area where I could improve. I have always thought the quilting was less important than the piecing but now I am coming to realise that the quilting is just as important, if not more important. So I am using this quilt to pracise my skills, try to get balanced overall quilting which complements the piecing and most importantly of all make sure that the quilt hangs properly without the dreaded wavy edges.
Basting was my first area of research as I was not very happy with the safety pin method I have used in the past. After seeing Sharon's quilts in Paducah I realised there was much I could learn from this very talented quilter. I suggest you have a look at her free videos.
I will keep you updated with my progress.
Wednesday, 18 November 2009
Noah's Ark Block - birds and tortoises.
I am busy working on my City & Guilds samples for college this coming weekend so not much 'proper' quilting going on. Although I have recently finished this block from Lynette Anderson's Noah's Ark series.
If you look in the sidebar you will be able to link to the other blocks I have made. I am now stitching the Ark.
Looking forward to visiting the Knit and Stitch show at Harrogate on Friday so it is going to be an enjoyable but busy weekend.
If you look in the sidebar you will be able to link to the other blocks I have made. I am now stitching the Ark.
Looking forward to visiting the Knit and Stitch show at Harrogate on Friday so it is going to be an enjoyable but busy weekend.
Monday, 16 November 2009
Don't call the quilt police!
I thought I would share this City & Guilds piece with you this morning - but beware some readers may find it upsetting!
The part I am referring to is the background quilting - if you look closely you will see it is all loopy. What's more - this is how it is supposed to be! Apparently it is a legitimate stitch in the world of machine embroidery - feather stitch!
Usually I have no problem getting this effect but I really struggled to get it to do this on this piece. I have to say I don't like it and it jumps out at me everytime I look at it. Anyway I have done the piece as I was instructed.
It has made up into a mini quilt 10 x 10 inches. When I showed DH he really liked and and asked if I could enter it into one of the quilt shows! Oh no I said, I would be ashamed to show it!
Do you think the judges would get it?
Thursday, 12 November 2009
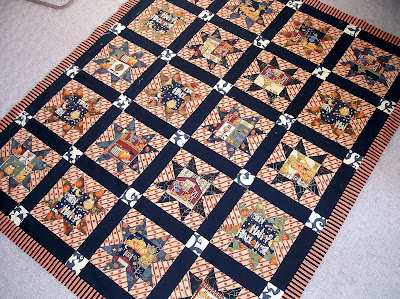
Halloween Quilt Top Completed.
Remember this quilt? It comes near the top of my UFO list and it is actually the second quilt I ever started. One of these days I will show my first quilt!
As Halloween approached I decided to get it out again and work on it. When we went to Scarborough at half term I found some orange and black which I thought would be perfect for the borders. The reason that it was not finished was because I could not decide on the borders so now I had no excuse.
First I added the stripe border. It is very bright and the jury is out on whether it is the right orange or not but I think it really lifts the quilt - which was in danger of looking a bit dull.
Sunday, 8 November 2009
Patchwork Bag Workshop
Last month I attended a patchwork bag workshop run by Sheila, a member of my embroidery/quilting group. It was a lovely day and Sheila worked very hard to ensure that we all made a lovely bag.
I chose Kaffe Fassett fabric for my main fabric - this is one of my favourite designs from his range.
The back and front are different and all parts including the sides were quilted before assembling the bag.
I chose Kaffe Fassett fabric for my main fabric - this is one of my favourite designs from his range.
The back and front are different and all parts including the sides were quilted before assembling the bag.
Tuesday, 3 November 2009
Saturday, 31 October 2009
Proud Mother!
My eldest son has a photo in his first photographic exhibition.
This is the photo which he took from a motorway bridge over the M1. This photo won a competition at his college and his prize was a two day visit to London to view the site of the 2012 Olympic Games.
The theme of the competition was 'Building Bridges' and it was to highlight the links between Barnsley in South Yorkshire and Newham in London.
Happy Halloween!
As we were driving from York to Whitby we passed this pumpkin farm and just had to stop. It looked more like the USA than North Yorkshire.
The farmer said it had been a bumper crop due to the wet weather in July and August and the dry sunny weather in September. If you look carefully at the top of the photo above our vintage camper van is in the background.
The pumpkins at the top of the photo above, in the wheelbarrow are 'blue' pumpkins which are supposed to be great roasted - I bought one of these and one traditional orange one. The ones on the wall have been spray painted black and gold!!
Today I have been making pumpkin pies and baked pumpkin cheesecakes for the Halloween party we always attend. I discovered that the best way to cook pumpkins is to cut them in half, remove the pith and seeds and then roast them in the oven cut side down. It only takes about 40 mins and then the skin just peels off. I can't believe how much flesh I have got from one medium size pumpkin - enough to make 5 large cheesecakes/pies and 2 pounds of pumpkin flesh put in the freezer.
Friday, 30 October 2009
Pictures of the sashiko exhibition York
Since my last post I have found a link which shows pictures of a lot of the sashiko textiles on display at York. This was given to me by Susan Briscoe who is well known for her work with sashiko.
Tuesday, 27 October 2009
Two quilt exhibitions - sorry no photos!
Well, no photos of quilts!
This week is half term in the UK and Geoff and I are having a few days away in our camper van. Yesterday we spent the day in York - it was a warm sunny autumnal day - we even ate dinner outdoors by the river.
The main purpose of our visit was to view the Sashiko exhibition at York Art Gallery and the Turkey Red exhibition at the Quilt Museum.
Monday, 19 October 2009
Another Mini Quilt inspired by a Vintage Plate.
I really enjoyed making the first mini quilt so decided to make another. This one is actually for my City & Guilds Machine Embroidery Collection, it is fusing snippets of fabric onto a background, covering with a sheer and free machining over the top using an automatic stitch. The only thing is I am actually free motion quilting using the automatic stitch! It is 10 inches square like the other one.
This is the original plate made by J&G Meakin in 1966 and the design is called 'Aztec'.
I really like how all the triangles fit together to make the circle - and I love the colours too!
I cut some strips of fabric, 1 inch or 1.5 inches wide and attached bondaweb to the back. I then cut the strips by eye into triangles and removed the bondaweb backing. Starting in the centre I arranged them into a circle onto a square of calico and as I was happy with each circle I ironed them down. I added a blue circle to the center and then covered with a sheer.
Thursday, 15 October 2009
Did you know I was a fan of Cath Kidston fabric?
Of course you did!!
Look what has just arrived - this new Cath Kidston book called 'Sew'.
What makes it really special is that it comes with free fabric to make your own Cath Kidston bag. I just love Cath Kidston bags!! You even get the label to sew on to it when you have made it.
All this cost just £9.24 and if you buy it here you get free worldwide postage.
Look what has just arrived - this new Cath Kidston book called 'Sew'.
What makes it really special is that it comes with free fabric to make your own Cath Kidston bag. I just love Cath Kidston bags!! You even get the label to sew on to it when you have made it.
All this cost just £9.24 and if you buy it here you get free worldwide postage.
Subscribe to:
Posts (Atom)